Publishing content online can feel difficult when you do not have a clear plan. You may have ideas for blog posts, social media updates, videos, or tutorials, but you might not know what to publish next. You may also forget deadlines or spend too much time deciding what to create.
A content calendar can solve these problems.
A content calendar is a simple plan that shows what you want to publish, where you will publish it, and when it should go live. You do not need expensive software or professional marketing experience to create one. Free tools such as Google Sheets, Google Calendar, and Trello can help you organize your ideas and build a consistent publishing routine.
In this guide, you will learn how to create a content calendar for free in 2026, choose useful topics, organize your publishing schedule, and measure your progress. The steps are designed for beginners, bloggers, freelancers, and small online businesses.
What Is a Content Calendar?
A content calendar is a schedule for planning and managing content. It can include blog articles, Facebook posts, Instagram updates, YouTube videos, newsletters, and other types of online content.
For example, a beginner blogger might plan to publish one article every Tuesday and share two related social media posts during the week.
Instead of asking, “What should I publish today?” the blogger can check the calendar and follow the plan.
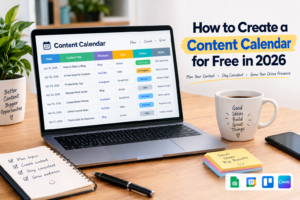
A simple calendar usually includes these details:
- Content topic or working title
- Content format, such as an article, video, or social media post
- Target audience
- Publishing platform
- Planned publication date
- Current status, such as an idea, draft, or published item
- Link to the finished content
You do not need to include every detail at the beginning. Start with the information that helps you stay organized, then add more fields when necessary.
Why Should You Use a Content Calendar?
Creating content without a plan can lead to inconsistent publishing and repeated topics. A calendar gives you a clearer view of your work and helps you use your time more effectively.
1. Save Time
Planning several topics at once can reduce the time you spend deciding what to create each day. You can prepare your ideas in one session and work on them throughout the week.
2. Stay Consistent
A realistic schedule helps you develop a publishing habit. You do not need to publish every day. Choose a schedule that fits your available time and follow it as consistently as possible.
3. Avoid Repeating the Same Ideas
When your planned topics appear in one place, it becomes easier to notice repeated subjects and identify missing topics.
4. Connect Content to Your Goals
A content calendar can help you create content that serves a purpose. Your goals might include educating readers, building an audience, showcasing your skills, or attracting potential clients.
5. Reduce Last-Minute Stress
Knowing what you plan to publish next week makes it easier to prepare drafts, check facts, create images, and review your work before publication.
Best Free Tools for Creating a Content Calendar
You can build a useful content calendar without buying a subscription. The best tool is the one you understand and will actually use.
1. Google Sheets
Google Sheets is a good option for beginners who want a simple spreadsheet. You can create columns for titles, dates, platforms, content types, and publication status.
You can also sort your ideas by date, use filters, and access your schedule from different devices when signed in to your account.
Start here: https://sheets.google.com/
Best for: Bloggers, freelancers, solo creators, and small projects.
2. Google Calendar
Google Calendar is useful when you want to see publishing deadlines alongside your other activities. You can create events for writing, editing, designing images, and publishing content.
For example, you could schedule article research on Monday, writing on Tuesday, editing on Wednesday, and publication on Thursday.
Start here: https://calendar.google.com/
Best for: People who prefer reminders and a visual weekly or monthly schedule.
3. Trello
Trello organizes tasks into boards and lists. You could create lists named Ideas, Planned, In Progress, Ready to Publish, and Published.
Move each content task between lists as you complete it. This makes it easier to see what needs attention.
Start here: https://trello.com/
Best for: Visual planners and creators managing several pieces of content.
4. Canva
Canva can help you design social media graphics, thumbnails, and other visual materials for your planned content. You can prepare the images alongside your calendar so that each publication has the necessary visual assets.
Some Canva features and templates may require a paid plan, so check the available free options before starting.
Start here: https://www.canva.com/
Best for: Creators who need simple visual content.
You do not need all four tools. Choose one main calendar and add another tool only when it solves a specific problem.
How to Create a Content Calendar Step by Step
Follow these steps to build a content calendar that works for your goals and available time.
Step 1: Choose One Clear Goal
Before adding topics, decide what you want your content to achieve.
A blogger might want to answer common questions in a specific niche. A freelancer might want to demonstrate professional skills and attract clients. A small business might want to explain its services and help potential customers make informed decisions.
Write down one main goal for the next 30 days.
For example:
“My goal is to publish four useful blog articles this month and share each article with relevant social media audiences.”
A specific goal is easier to manage than trying to grow every platform at once.
Step 2: Understand Your Audience
Your content should answer questions that matter to the people you want to reach.
Think about the problems your audience faces, what they are trying to learn, and which tasks they find confusing.
If your audience includes beginners interested in digital skills, possible questions might include:
- Which free tools should I learn first?
- How can I organize my work?
- How do I build a simple online portfolio?
- How can I improve my writing?
- What should I include in a beginner’s project?
You can collect ideas from questions people ask, relevant online communities, search suggestions, customer feedback, and your own experience.
Do not assume every topic will attract traffic. Treat your ideas as starting points and use audience feedback and performance data to improve your choices.
Step 3: Choose Three to Five Content Categories
Content categories help you organize your ideas into related groups.
For a website about digital skills and online work, categories might include:
- Digital skills for beginners
- Content creation and productivity
- Freelancing and remote work
- Blogging and website management
- Practical tutorials using free tools
Choose categories that match your website’s purpose. Avoid creating a calendar full of unrelated topics just because they are popular.
A focused plan helps readers understand what they can expect from your website.
Step 4: Collect at Least 15 Content Ideas
Create a list of possible topics before assigning publication dates. This gives you options when one idea requires more research than expected.
For each idea, write a working title and a short explanation of what the reader will learn.
For example:
| Working title | Reader benefit |
|---|---|
| How to Organize a Digital Workspace for Free | Helps beginners organize files and tasks |
| How to Create a Weekly Study Schedule | Helps learners manage their time |
| Free Ways to Improve Your Blog Images | Explains practical image improvements |
| How to Plan Social Media Posts in Advance | Helps creators prepare posts efficiently |
| How to Build a Simple Project Checklist | Helps freelancers manage small projects |
These are starting ideas, not guarantees of search traffic. Before writing, check whether the topic fits your audience and whether you can provide useful details that are not simply repeated from other websites.
Step 5: Build Your Calendar in Google Sheets
Open Google Sheets and create a blank spreadsheet. Add these columns:
- Publish date
- Content title
- Content category
- Content format
- Platform
- Status
- Target audience
- Final content URL
Use simple status labels such as Idea, Planned, Writing, Editing, Ready, and Published.
You can add colors to make the calendar easier to read, but keep the system simple. A spreadsheet that takes too much time to maintain can become another task instead of a useful tool.
Step 6: Choose a Realistic Publishing Schedule
Your schedule should match the time you actually have.
If you are working alone, publishing one high-quality article per week may be more manageable than publishing every day. You can then share related updates on social media without having to create entirely new material each time.
For example, one blog article could become:
- One Facebook post introducing the main lesson
- One short checklist summarizing the key points
- One question inviting readers to share their experiences
- One follow-up post answering a common question
Each format should offer value on its own and direct readers to the full guide when relevant.
Avoid copying the same message repeatedly across groups. Follow each platform’s rules and focus on useful, relevant sharing.
Step 7: Add Research, Writing, and Editing Dates
A publication date is only one part of the process. Give yourself time to prepare the content.
For a blog article scheduled for Friday, your workflow might look like this:
- Monday: Research the topic and outline the article.
- Tuesday: Write the first draft.
- Wednesday: Check facts, improve examples, and edit.
- Thursday: Add images, links, headings, and metadata.
- Friday: Publish the article and share it where appropriate.
This schedule is only an example. If you have limited time, spread the work across two weeks instead.
Step 8: Prepare Content in Batches
Batching means completing similar tasks during the same work session.
For example, you could research three article ideas on Monday, write outlines on Tuesday, and prepare social media captions on Wednesday.
Batching may reduce the time spent switching between different types of work. However, do not create more content than you can review properly.
Leave room in your calendar for unexpected tasks, updates, and improvements to older articles.
Step 9: Review Before Publishing
Before publishing a piece of content, use a checklist.
- Does it answer the reader’s question?
- Are the facts and examples accurate?
- Is the writing clear and easy to follow?
- Are the headings organized logically?
- Do links work and lead to relevant resources?
- Are images appropriate and accessible?
- Is the title an accurate description of the content?
- Have spelling and grammar been checked?
For blog posts, also check the page on a mobile device and confirm that the publication is accessible to visitors.
A calendar helps you plan the work, but it does not replace careful editing.
A Simple Seven-Day Content Calendar Example
Here is an example of a weekly plan for a beginner who wants to publish one blog article and share useful social media content.
| Day | Task | Expected result |
|---|---|---|
| Monday | Research one topic | Notes and useful sources |
| Tuesday | Create an outline | Article structure |
| Wednesday | Write the draft | First version |
| Thursday | Edit and prepare visuals | Publication-ready article |
| Friday | Publish the article | Live website page |
| Saturday | Share a useful summary | Social media post |
| Sunday | Review the week and plan ahead | Updated calendar |
You can change the days to fit your routine. The important thing is to give each task a place in your schedule.
How to Measure Your Content Calendar’s Results
After publishing for a few weeks, review what is working and what needs improvement.
Useful measures include:
Publishing consistency: Did you complete the work you planned?
Audience engagement: Did people respond, comment, share, or ask questions?
Website performance: Are relevant pages receiving impressions, clicks, or visits?
Content quality: Are readers finding the information they need? Are there sections that need clarification or updating?
Time spent: How long did each type of content take to research, write, and publish?
For a website, tools such as Google Search Console can help you understand how pages appear in Google Search. Google Analytics can help you examine website traffic when correctly configured.
Search results and traffic can take time to develop. Do not judge a new article only by its first few days of performance. Look for patterns and use the information to make better decisions.
Common Content Calendar Mistakes to Avoid
Planning Too Much
A calendar with several publications every day may look impressive, but an unrealistic schedule can lead to unfinished work. Start small and increase your publishing frequency only when you can maintain quality.
Ignoring Your Audience
Do not choose topics only because they are trending. Make sure they answer relevant questions and fit your website’s main subject.
Focusing Only on Publication Dates
Research, editing, images, and fact-checking also take time. Include these tasks in your plan.
Never Updating Older Content
Some information becomes outdated, links stop working, and readers may need clearer explanations. Reserve time to review important older pages.
Publishing Just to Fill the Calendar
A completed schedule is not the same as useful content. If a topic does not offer meaningful value, improve the idea or replace it.
Depending on Too Many Tools
Using several apps can make your workflow more complicated. Begin with one spreadsheet or calendar and add other tools only when necessary.
Frequently Asked Questions
Can I create a content calendar for free?
Yes. You can create a basic calendar using Google Sheets or Google Calendar. A notebook can also work if you prefer planning on paper.
How far ahead should I plan my content?
Beginners can start with one or two weeks. Once the system becomes easier to maintain, planning a month ahead may help. Keep some space for timely topics and unexpected changes.
How many posts should I publish each week?
There is no single ideal number. Choose a frequency you can maintain while researching, checking facts, and creating useful content. Consistency and quality matter more than an ambitious schedule you cannot sustain.
Can I use AI to help plan content?
AI tools can help brainstorm topic ideas, group related subjects, and create draft outlines. However, review the suggestions carefully. Check facts, add your own examples, and make sure the final content answers a real audience need.
Do I need a separate calendar for every social media platform?
Not necessarily. You can use one main calendar with a platform column. If your project becomes more complex, separate views may help you manage different publishing requirements.
Is a content calendar useful for a small website?
Yes. Even a small website can benefit from planning topics, publication dates, and updates. A simple calendar can help a solo website owner organize work without buying expensive software.
Final Thoughts
Creating a content calendar for free does not require advanced marketing skills or complicated software. Start with one clear goal, choose a few relevant categories, collect useful ideas, and organize them in a simple spreadsheet or calendar.
Then create a realistic weekly schedule that includes research, writing, editing, and publishing. Review your progress regularly and adjust the plan when necessary.
The purpose of a content calendar is not to publish as much as possible. It is to help you create useful content consistently, understand your audience, and make better use of your time.
Start today: Choose three topics, schedule your first piece of content, and build your calendar one step at a time.
If you are planning to start a blog, read our guide on how to start a blog and make money online in 2026 to learn the basics of building your website and creating content for your audience.